About this deal
Then I simply cut a circle at the front of the pumpkin, painted it lilac and used to a glue gun to add the glittery silhouettes and paper flowers. Also used battery candles, just in case!' However, that doesn’t mean you can just drill three identical holes and say, “Look, it’s all surprised now!” because that’s not how it works. If you do that, you’ll basically have a pumpkin-shaped bowling ball, and we don’t want that now, do we? Instead of drilling round holes for the eyes, try making them look like upright eggs, and for the mouth, try making it look sort of like a comma (the symbol) but upside down. You can also add a tiny little nose between the lower sections of the eyes, and if you’re confused, try using our photo as an example. 16. Pumpkin Design – Drilled Vases Creating the entrance to your pumpkin from the bottom instead of the top allows for you to pull the insides out easier and creates a more streamlined look. If using a real candle, it also prevents the risk of accidental burns when lighting the flame inside as you can place your pumpkin on top of the candle instead of trying to drop a lit candle in. We recommend carving your pumpkin on the kitchen counter or dining table. Wipe down and cover your surface with cardboard, newspaper or a plastic sheet before you start. Be careful when using sharp tools and always supervise children. We’d also suggest having a bowl ready to scoop the insides of your pumpkin into - as it can get messy.
Avoid using real candles: The heat from real flames can cook the pumpkin, drying it out and speeding up the decay process. Using battery powered candles can provide the same lighting effect without the negative impact. This way, you can also try out different color lights! To carve your scream pumpkin, you’ll need a pumpkin carving kit or a sharp knife and spoon. The kit should include a variety of blades in different shapes and sizes, as well as a scraper for removing the pumpkin’s insides. Scream Pumpkin Carving: Step-by-Step Guide Remember, the more complicated the design, the greater the risk for something going wrong – so if you’re not completely confident you know how to carve a pumpkin like a pro, start with something a little more simple, like an easy silhouetted shape, or something without lots of details. Maybe your kids were a big fan of the Disney idea, but the princesses aren’t their favorite part? Here’s a design for the fairy lovers in the group! Instructables shows you how to cut out a big piece in the shape of Tinkerbell, followed by tiny circles in different sizes to make it look like she’s just flown in, leaving a trail of fairy dust. 20. Cool Pumpkin Carving – Skull in a PumpkinAre your kids big fans of anything involving cute animals? Then try making this adorable, furry little raccoon with them! The design is quite simple except for the muzzle, where you’ll simply carve away enough of the outside that the light and shine through the pumpkin wall, rather than actually cutting the piece out completely. BHG shows you how it’s done. 25. Pumpkin Carving Idea – Anatomy When you cut into your pumpkin it will start to rot, so we recommend leaving the carving to the last minute if you still want it looking fresh on Halloween. There are also a few ways to maximise the lifespan of your pumpkin. After carving, soak your pumpkin in cold water with a small amount of bleach. When removed, dry it well to extend its freshness. You can also spray the pumpkin daily with a water/bleach solution to rehydrate and stop mold. This should be done by an adult and children should be kept away from potentially harmful chemicals. If you’re carving with children or under 18, you should always make sure there is an adult present throughout the pumpkin carving process to supervise and make sure carving is fun but safe! Safe Carving: Always prioritize safety when using sharp tools. Adult supervision is necessary if children participate in carving. Pumpkin carving, much like any other artistic outlet, requires a lot of patience, a steady hand, a bit of strength (you can’t possibly imagine how hard pumpkin shells can get), and a lot of practice. You can’t expect to be a master sculptor just moments after touching a pumpkin and a chisel for the first time in your life. Well, not teach you as in offer you guidance through the whole process, but at least give you some pointers on what to do next once you’re sitting there holding the chisel or CNC machine (yes, some people use carving machines such as the Dremel Stylo to carve pumpkins) staring at your pumpkin.
I recently learned from DIY blogger, Stephanie Hanna that you can carve foam craft pumpkins with a hot knife. I own a wood burning set from a previous The Crafter's Box kit that includes a blade so I tried my hand at carving craft pumpkins and am in love with the results and the simple fact that I can bring them out year after year!Although Halloween is a spiritual holiday that symbolizes the end of summer and harvest, it has become a people’s holiday, and it can mean a lot of things, depending on who you’re asking.
Once you've carved your masterpiece, these pumpkins can be used as striking decoration pieces. Place a candle or a light inside to highlight the ghostly face and create that unforgettable Halloween ambiance. These cauldrons of light can be positioned in your house, on the porch, or as a centerpiece for a Halloween party. HOW TO PRINT THESE PUMPKIN CARVING STENCILS If you really want to know how to carve a pumpkin like a pro, instead of cutting through, instead try the ‘scraping’ method we mentioned before – carve away the dark bits of the design, so you’re not cutting all the way through the pumpkin, but instead carving through the wall of the pumpkin’s skin to a depth of about half a centimetre. It’s sometimes easier to go from the centre of the areas you’re cutting out towards your scored lines, as this helps you keep the details intact. You can also use a potato peeler to help you scrape away some of the larger areas. We can all agree that cats are a staple Halloween item already, and the moon and stars have this sense of mystery and fantasy about them, so matching them all together certainly seems like a great idea. We’re not so sure about the fishbone, though, but it honestly doesn’t bother us at all, and we actually believe that it ties everything up pretty well. Hey, carved pumpkin kitties must go hungry at some point, right? It really depends on the pumpkin, the carving, and a bunch of other factors,' says Marc Evan, co-founder of Brooklyn, NYC-based, Maniac Pumpkin Carvers. By the looks of the example in our photo above, you’ll need to put some skills into it, so simply slashing the pumpkin and drilling holes into it won’t be enough to pass this time, unfortunately. As you can notice, the design has varying levels of depth for both the eye and the teeth, so you’ll have to be careful how far you’re driving the carving knife or CNC machine on it. We recommend working with layers, seeing as it’s a lot simpler than freehanding the entire carving pattern.While we love all three of these pumpkin carving ideas by @morning.sophie, we're particularly fond of the foil-braced orange face who has received some orthodontic work from its owner. But if your DIY Halloween decorations go as far as carving a few triangles into this beautifully colored gourd – don't be scared, as there is plenty to inspire you creatively in spooky season. Pumpkin carving ideas to practice If you’re going to attempt some more advanced pumpkin carving designs, you’ll need a few extra bits and tools.
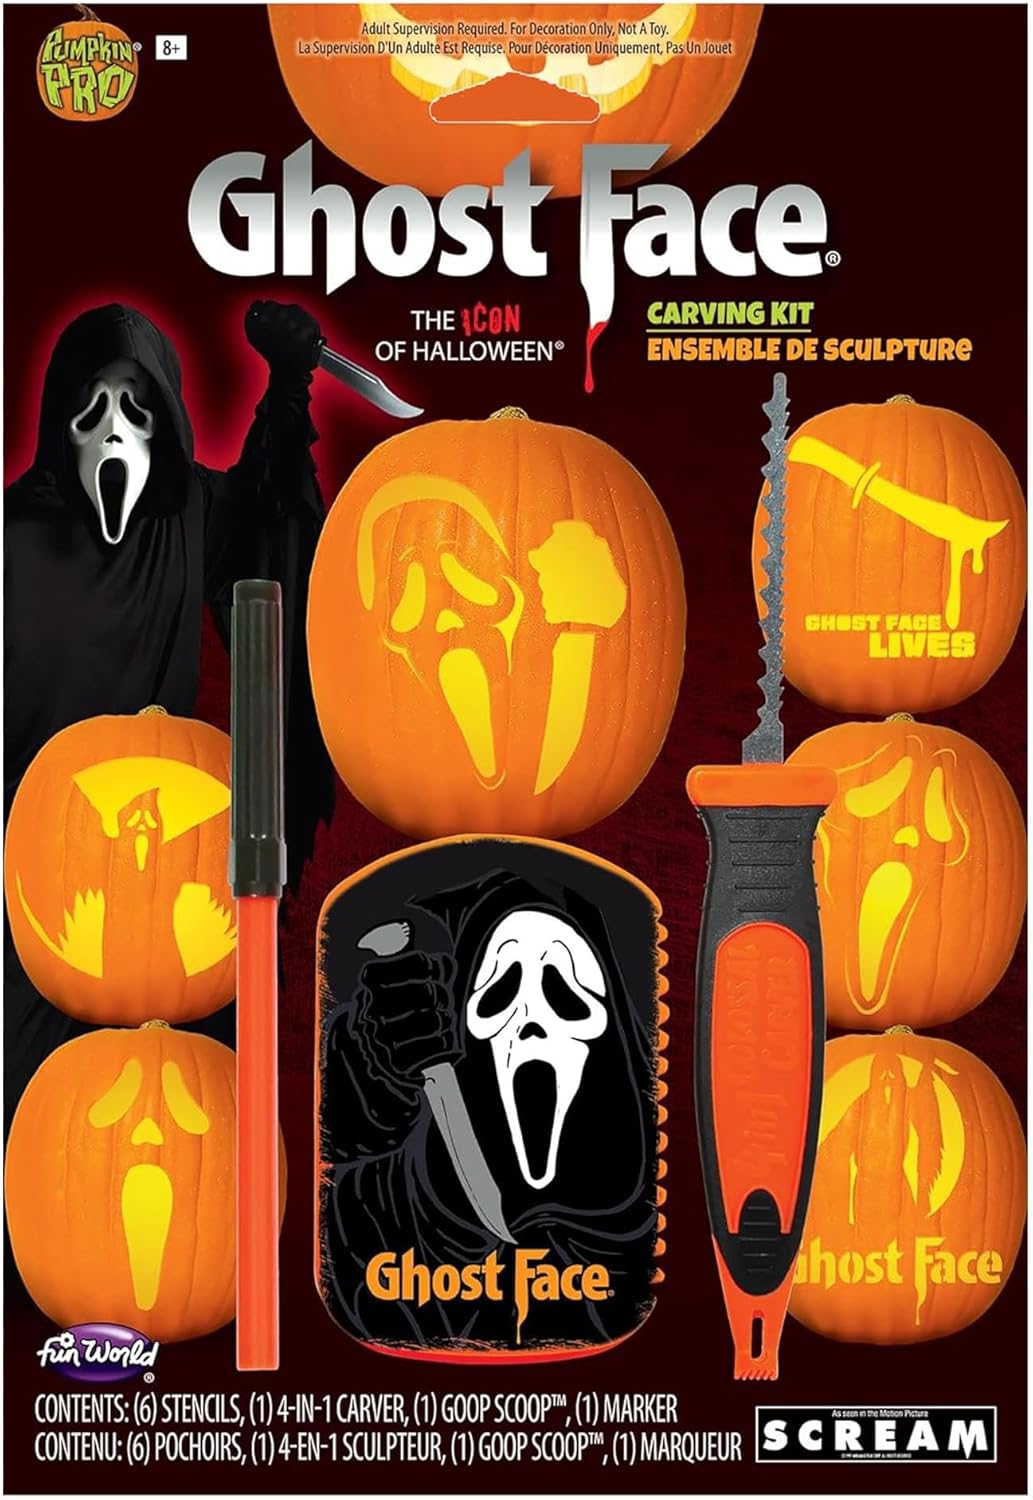
While it’s obvious that our picture actually depicts a mask (possibly made of foam), it’s not at all complicated to adapt this design and apply it to your pumpkins. Sure, you’ll have to be extra careful as this design consists of a bunch of extra-sensitive details (the wires holding the mask’s mouth together, for instance), and you’ll have to be very gentle with your carving knife (although a handheld CNC machine would be infinitely better in this situation). If you’ve ever been a fan of slasher horror movies, then you must’ve seen Scream, a movie that has become a classic of the genre since its release. We won’t get into detail and blabber about that movie, nor its horrible sequels, but if you didn’t see it and still recognize the mask, you might’ve seen it in the parody, Scary Movie. The Ghostface killer had a mask that almost anyone can recognize nowadays, as it’s become somewhat of an icon for Halloween and horror movies. As a kid, David LaRochelle raised pumpkins at a friend’s farm and sold them in his front yard at Halloween. “I never dreamed that someday I would be interviewed on national television shows as a professional pumpkin carver!”The creepy grin is a bit more complicated than others, seeing as you have to make certain parts of it (the teeth) round and work with various carving depths to achieve the best results. However, once you place a lit candle or another light source inside of it, you’ll understand that the fact that it’s a bit more complicated than other designs also has a huge payoff. In the dark, this carved pumpkin does look very creepy when you light it up. Cats, cats, cats, everybody loves them, and Halloween is incidentally a great opportunity to show your affection for these little (sometimes evil) bundles of joy. Although it’s not the first example of carving a cat into your pumpkin (and trust us, it’s not the last, either), it’s different. This creeping cat design looks like it’s been pulled from a Tim Burton movie, as it’s incredibly frail, with thin members, and some over-exaggerated features, but we absolutely love it!
 Great Deal